What is wrong with this image?

What is wrong with this image?

tips and tricks for using images correctly and fixing common problems

What is a responsive image?

A responsive image is an image that automatically adjusts its size and resolution based on the size of the screen or browser window it’s being viewed on. This ensures that an image looks good on a variety of devices, from desktops to tablets to smartphones, while optimizing loading times and bandwidth usage.
 

Why does this image look fine on my screen but strange on other screens?

This is expected. A responsive image will look different for each viewer depending on what device they are using to view your site and the size of their browser window. If you resize or crop your image so it looks perfect on your screen, you might be making it look worse for other site visitors. 

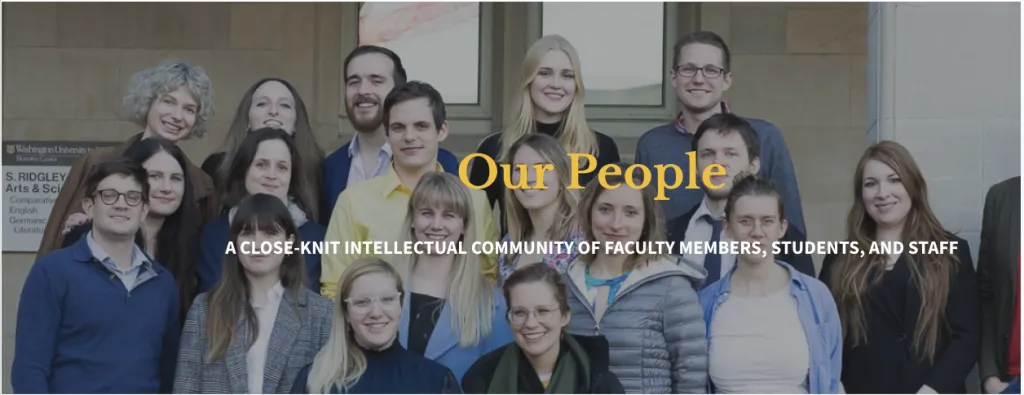
For example, if your browser window is 1250 pixels wide and you adjust and upload this image to the header section of your people landing page, it may look great on your computer. However, by making these adjustments this is what the same header image looks like in two other different size browser windows:

1250 pixels wide:

1680 pixels wide:

2400 pixels wide:


How can I avoid this?

A single image will never look perfect on all browser sizes and devices. The goal should be to make it look good for as many people as possible. This means that sometimes you may not be able to use a particular image in certain places. Many times, the only solution might be to choose a different image. These are a few tips for making sure the images you are using are displaying properly on your website:

Don't crop or enlarge your photos

When you enlarge your photos, they will start to pixelate. If you are enlarging your photo because it doesn't meet the minimum size, you will get better results from using an alternate photo than trying to enlarge the one you have. 

Make sure you have a large margin around the subject of the photo

The A&S web theme automatically crops your photos after you upload them to the website. If you crop it before you upload it, it will cause all of your photos to be super close up and look bad on certain screen or device sizes. 

Use the focus tool

The focus took works by 'shifting' the photo so that a certain area is centered. If you are using a photo that is only the minimum size, the focus tool won't have any room to make that shift. Using a larger than minimum photo will allow that focus tool a larger area to make that adjustment.

Choose a photo that is oriented correctly

If the heads of people in your images are getting cut off, this is likely why. When adding photos, keep in mind how and where the photo will display.  If the space that the photo will appear in is landscape-oriented, don't use a portrait-oriented photo.  If the photo area is portrait-oriented, don't use a landscape-oriented photo. 

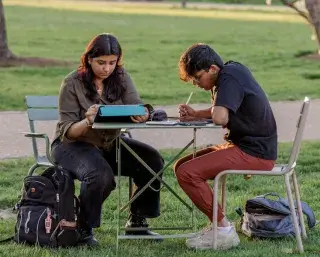
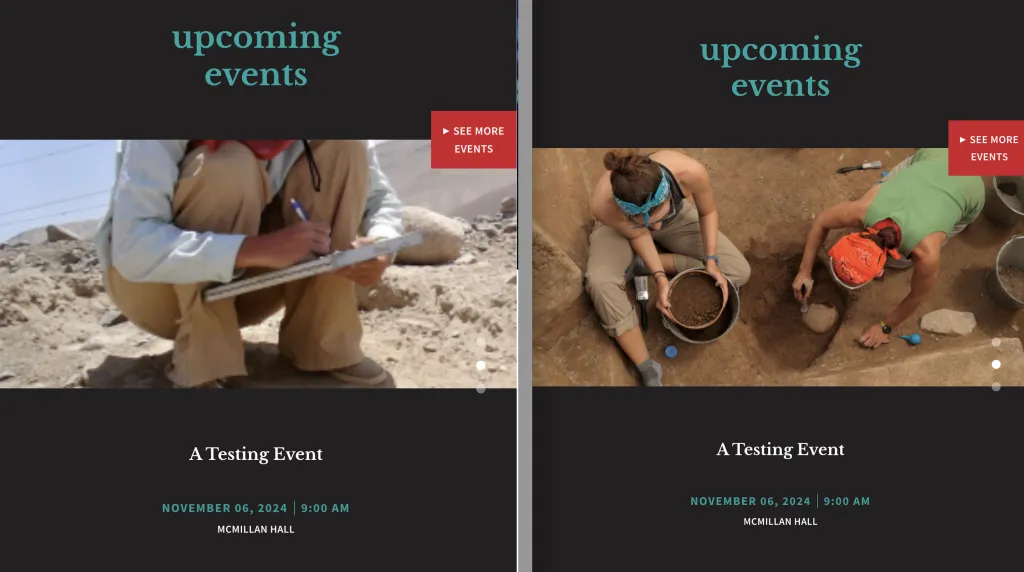
For example, if you wanted to promote an event to the Events and Two Articles section on the home page, the image in that section always displays landscape-oriented. This is what that section looks like if you correctly use a landscape-oriented image (right) versus an incorrect portrait-oriented image (left): 
Resizing vs Cropping
 

Before you attempt to alter any of your photos, it's important to understand the difference between resizing and cropping.

Resizing:

Resizing changes the size of an image, but allows it to keep the same shape and height to width ratio. For example, if you resize a rectangle-shaped image to make it smaller, you will still have a rectangle with the same ratio, not a square. It is the exact same photo you started with, except smaller.


Cropping:

Cropping removes portions of the image and can change the size, shape, and height to width ratio.


Why shouldn't I crop my images?

Very rarely will you ever need to crop a photo you want to use on an Arts & Sciences website. Because our web theme automatically crops a photo when it is displayed, we recommend you upload the photo as-is to see what it looks like before you try to alter it. If you crop an image, you won't be able to enlarge it without losing some of the photo's quality, causing it to look fuzzy or pixelated. It's also very important to make a duplicate of your photo so you still have a copy of the original. Once you crop a photo, it can't be undone.  


What are pixels?

When determining the correct size for a website image, all height and width measurements are done in pixels. The number of pixels inside of an image is the image size and the number of pixels that fit into a square inch of the image is the resolution. Resolution mostly matters when you are printing, but is meaningless on the web because the device that you are using to view the image (monitor, tablet, phone, etc) will determine its resolution.


Resizing Tools

Web Resizer

Web Resizer is a free online tool for resizing and optimizing images for the web. Because you upload your image to the tool, you don't need to download any special software. Since it is a web application, you can use it with a PC or Mac.

  • Go to the Web Resizer site.
  • Upload your image using the 'upload image' button.
  • To resize, change the number of pixels in the 'new size' text box.
  • After making your changes, click the 'apply changes' button and then click 'download this image.'


GIMP

GIMP is a free open-source image editing application similar to Adobe Photoshop and can be downloaded to a PC or Mac. GIMP has more features than Web Resizer and allows you to create artwork and also has graphic design elements.


Mac Image Editors

There are two ways to edit photos on a Mac using the default features. If you have a Mac and just need a simple and free way to resize photos, preview is a great option.

Preview:

  • Right-click on a photo on your desktop. 
  • Choose 'open with' and then select the 'preview.app' option.
  • This will open up the Preview toolbar at the top of your screen. From there, you can choose the Tools option to resize your photo.


Microsoft Photo Editors

What photo editors are available and what steps you need to take will be determined by what version of  Windows is on your computer. 


Adobe Photoshop

Adobe Photoshop is a commercial image editing software and requires a license to download. If you have questions about licensing, please contact your department support rep.  If you just need an easy way to quickly resize photos, you probably don't need Photoshop. 


Image Focus Tool

The Image Focus Tool is available for images that are added to website sections. It is a feature that allows you to 'shift' the photo so that a certain area is centered. This tool If you are using a photo that is only the minimum size, the focus tool won't have any room to make that shift. Using a larger than minimum photo will allow that focus tool a larger area to make that adjustment. This tool is meant to give your image a nudge in a particular direction. It will not make a major shift in how your image displays.

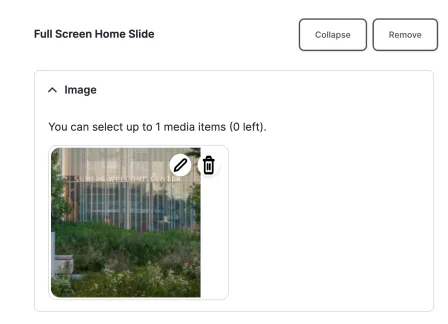
When you edit a section with an image, you will see a pencil icon and a trashcan icon.

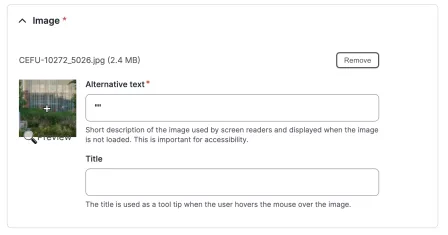
If you click the pencil icon, you will get a popup window with a small preview version of the image, an alternative text field, and a title field. You can click and drag the + in the image in order to set its focal point. 

Thumbnail and Header Image Issues

The thumbnail header images you are uploading don't just live in their respective event or article.  You may think you don't need thumbnails and header images, but when it comes to content share, other people do!  When your content is shared to another site, they are unable to add a photo. This means that when they display your article or event on their site, it will only show the default ampersand image which may discourage them from featuring it. Also, if you are hoping to have your content shared on the Artsci site or the Ampersand page, it is crucial to have a thumbnail photo.  

How to choose a great thumbnail photo

  • Upload the image to see what it looks like before you resize the photo
  • Don't use a flyer or anything with text
  • Use a photo larger than the 600x600 minimum so the focus tool will work
  • Don't use a close-up
  • Choose one that will look nice in both landscape-oriented and portrait-oriented spaces

How to choose a great header photo

  • Do not crop the photo. Resize only after you upload the image to see what it looks like first.
  • Don't use a flyer or anything with text
  • Use a photo larger than the minimum size so the focus tool will work
  • Don't use closeups of people or headshots 
  • Use a landscape-oriented photo


Reminder about using Images with Text

Images with text can negatively affect your website,  the user's experience, and reduce traffic to your website.  Not only do they cause problems for people with vision impairments, but also for people who are just trying to find information on your website. Keep in mind that search engines can't read text in an image. If a user Googles the name of your event and all of the event information is on a flyer, it will not show up in the search. 

Learn more about images with text